RentHQ to Xero Integration
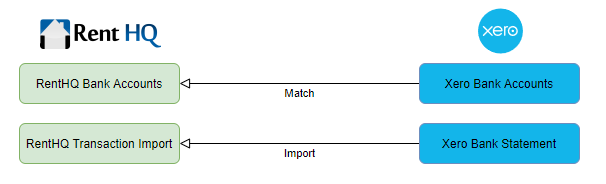
- RentHQ only reads a small amount of information out of your Xero Account. No data is transfered back from RentHQ to Xero.
- RentHQ gathers some basic account details such as the list of bank accounts, and makes those available to match back to your RentHQ bank accounts.
- RentHQ imports transactions out of your Xero bank accounts into RentHQ, where they can be classified, for example to match a tenants rent payment to the correct property and tenant account.
Before you can use RentHQ and Xero together, you need to Connect to Xero and set up the bank account(s).
You can either watch a training video explaining how to connect to Xero or use the instructions listed below.
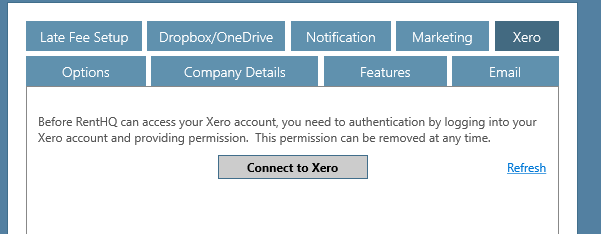
Step 1Go to the Function/Setup/Options screen, and select the Xero tab. On the Xero tab press the 'Connect to Xero' button.
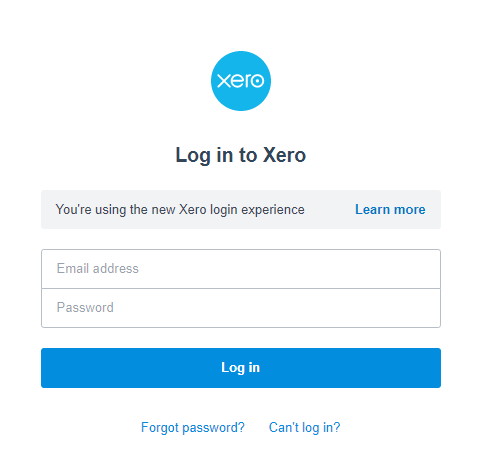
Step 2You will then need to enter your Xero user name and password into a new popup window.
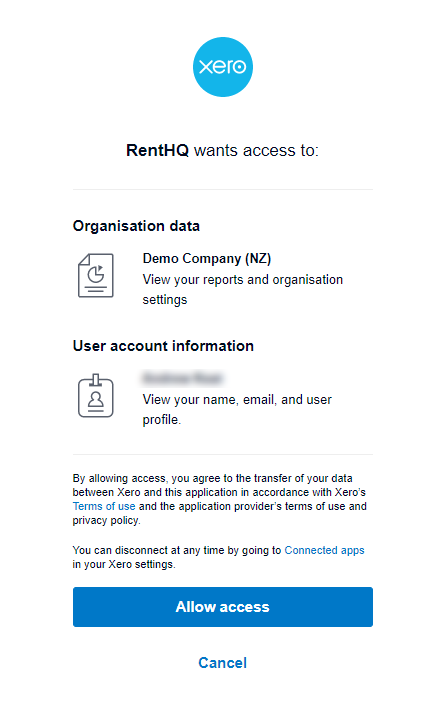
Step 3After successfully entering your Xero user name and password, you will be asked to confirm you want to allow access.
Step 4After allowing access, you will see a screen confirming your link has been established with further instructions. You can close this browser window now.
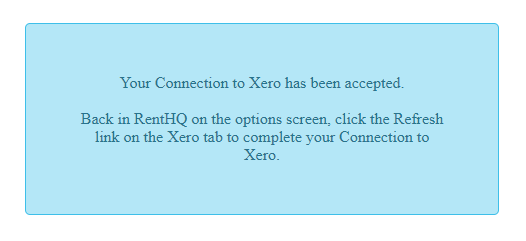
Step 5Return back to the RentHQ options screen. Here you will press the Refresh link button. If the connection was successful, RentHQ will display the name of the organisation RentHQ is now connected to with a list of Xero bank accounts for this organisation(s).
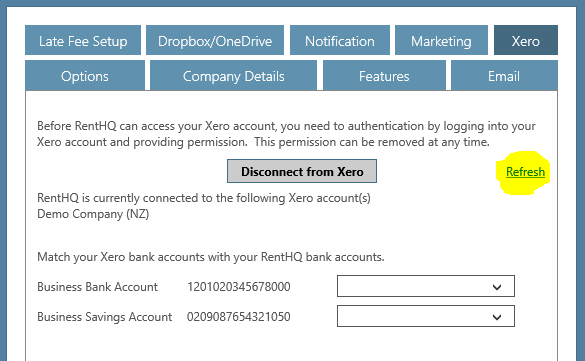
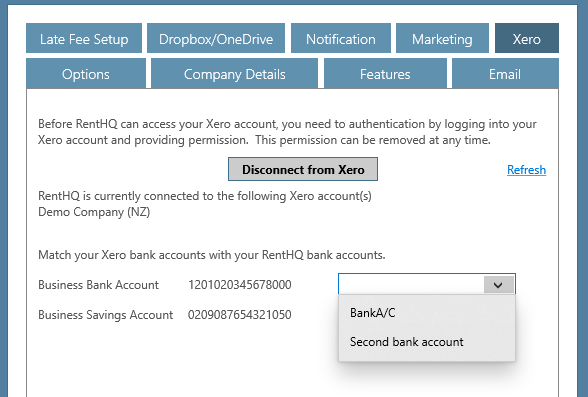
Step 6While still on the Options screen, you can now match your Xero bank accounts (shown on the left below) with your RentHQ bank accounts using the dropdown options. You only need to match the bank accounts you intend to import transactions from.
You can either watch a training video explaining how to connect to Xero or use the instructions listed below.
Step 1Go to the Function/Setup/Options screen, and select the Xero tab. On the Xero tab press the 'Connect to Xero' button.
Step 2You will then need to enter your Xero user name and password into a new popup window.
Step 3After successfully entering your Xero user name and password, you will be asked to confirm you want to allow access.
Step 4After allowing access, you will see a screen confirming your link has been established with further instructions. You can close this browser window now.
Step 5Return back to the RentHQ options screen. Here you will press the Refresh link button. If the connection was successful, RentHQ will display the name of the organisation RentHQ is now connected to with a list of Xero bank accounts for this organisation(s).
Step 6While still on the Options screen, you can now match your Xero bank accounts (shown on the left below) with your RentHQ bank accounts using the dropdown options. You only need to match the bank accounts you intend to import transactions from.
Before you can use Xero, you need to complete the setup instructions above. You are then ready to start importing your transactions.
Go to the Transactions/Import Statement menu option. Choose the RentHQ bank account from the dropdown list available.
If the bank account has been linked to Xero, the option to Import from Xero will be selected automatically for you.
You can specify a start date for the import process if required. This will automatically default to the last date a successful import was completed.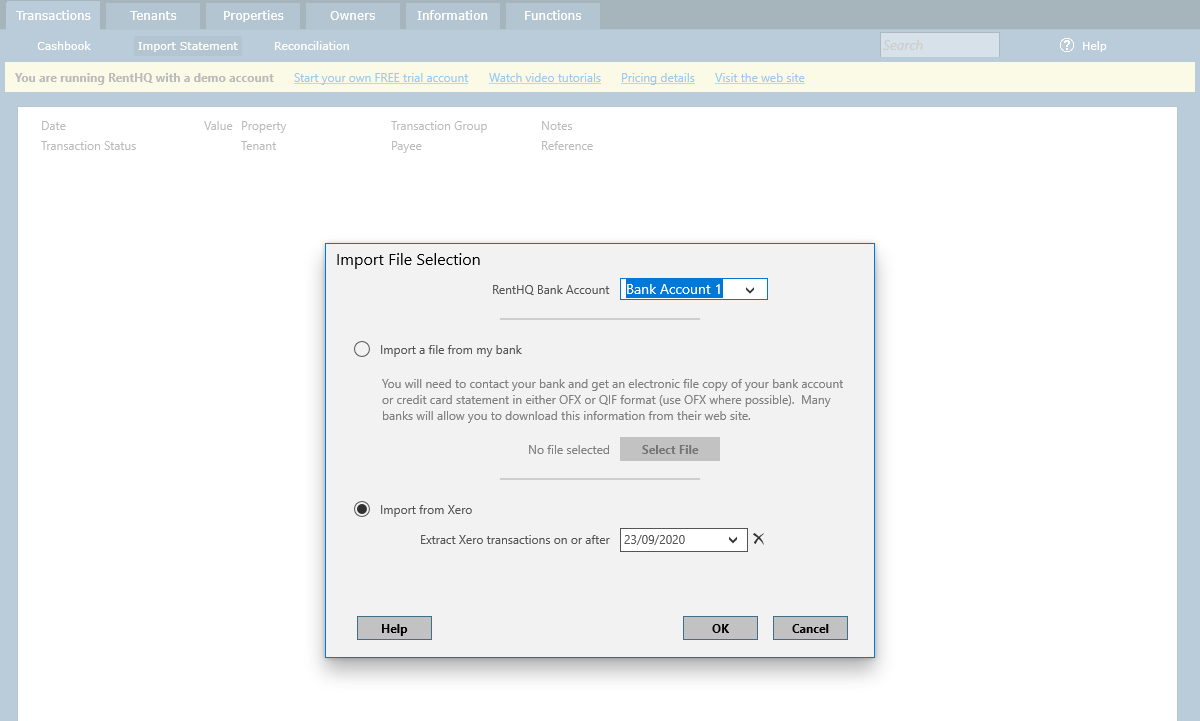 Your Xero transactions will be downloaded from the Xero web site. You can then complete the import process classifying the transactions and creating import rules. We have created a detailed video showing how to complete the transaction import process.
If the bank account has been linked to Xero, the option to Import from Xero will be selected automatically for you.
You can specify a start date for the import process if required. This will automatically default to the last date a successful import was completed.
Your Xero transactions will be downloaded from the Xero web site. You can then complete the import process classifying the transactions and creating import rules. We have created a detailed video showing how to complete the transaction import process.